 |
| By Kate Davis |
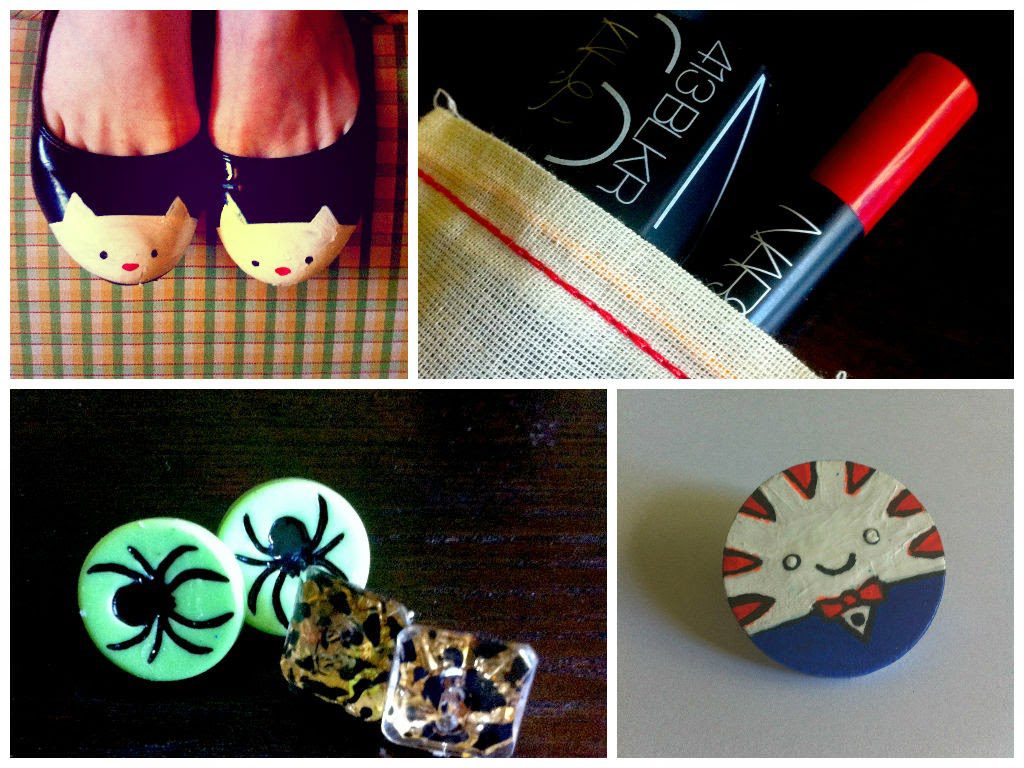
Whether you’re looking to make something for yourself, putting together a gift or a party, these geeky crafts are sure to please. I’ve lined up four pretty rad crafts for you today and none of them are terribly time consuming either.
In fact, I did all four in an afternoon!
So, if you don’t have loads of time to create dancing baby Groot dolls, these are the perfect solution for the restless crafter.
I personally enjoy them because they’re all so highly personalized, so you can geek ‘em up or normal ‘em down.
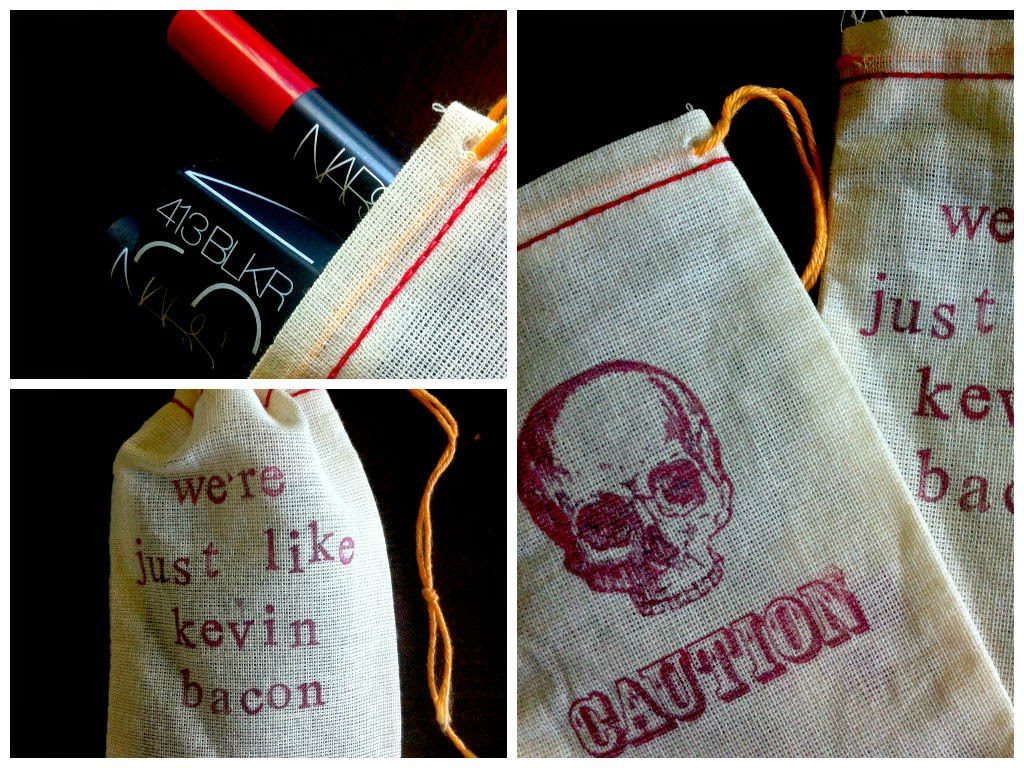
I love these because you can use them for a buttload of different occasions. And the best part? You can easily customize them to match your personality or event. They’re awesome for holding wedding favors, birthday party swag, or as a mini-travel makeup bag!
Materials:
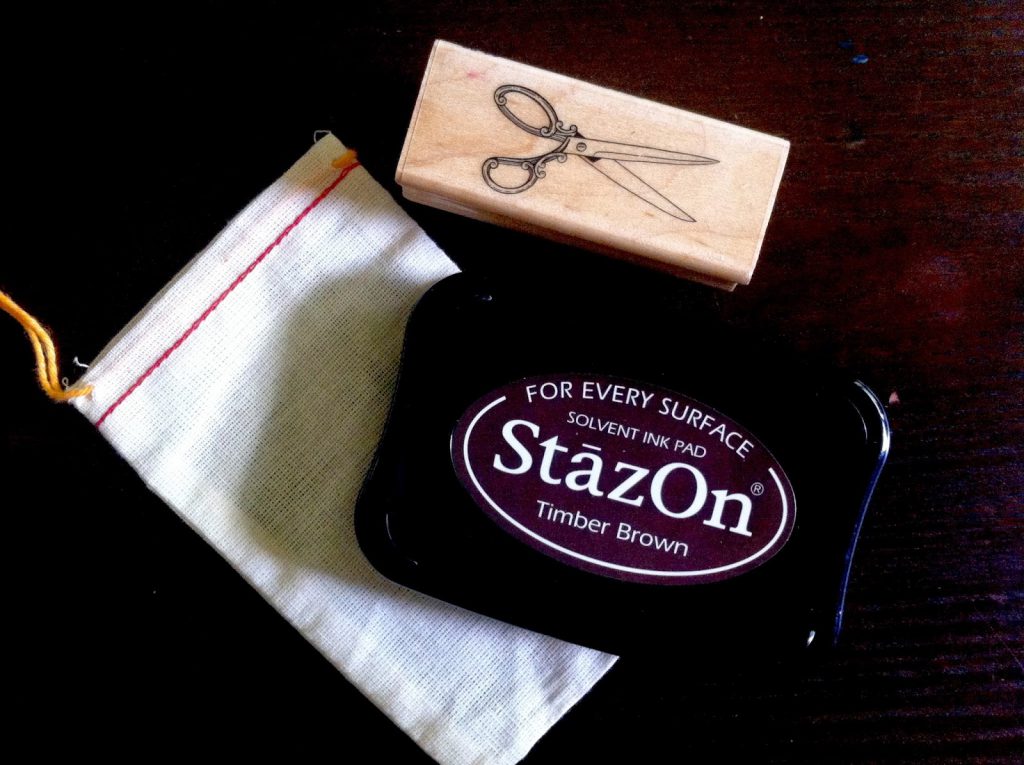
- 4×6 Muslin Bags (I got mine from Amazon)
- StazOn Permanent Ink Pad
- Alphabet, Pattern, or Shape Stamps
- Small Piece of Cardboard
1. Before you stamp, leave at least a ¾ inch space from the top of the bag. If you don’t, your picture will be warped when you draw the strings of the bag.
2. Put a little piece of cardboard in the bag so your ink won’t bleed through.
3. Align your stamp evenly and apply pressure. Be careful of to make sure you don’t get ink on the sides of the stamp. If you do it can leave a big ink square around your image and no one wants that.
3. Allow at least half an hour for the ink to dry entirely before putting anything in the bag.
Kicky Kitty Flats!
I don’t know about you, but I am stubborn as hell about buying new shoes. I either wear them until I literally can’t look at them anymore or I snazz them up with polish or paint. Here’s a quick way to turn those near-death shoes into compliment worthy kicks.
Materials:
- Old Flats
- Paint brushes
- Painters tape or masking tape
- White, black, red paint
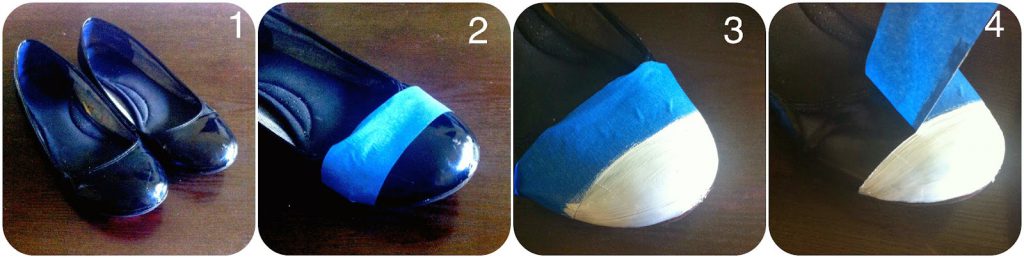
1. Start with a pair of old, scruffy flats you don’t really use anymore. I used a patent leather pair, but it’s easier if you use a matted leather instead. It requires less coats and looks a little cleaner.
2. Using painters tape, leave about half of the front uncovered, there’s where your kitty face will be. Make sure the open area you’re going to paint is roughly the same size on both shoes.
3. Do at least two coats of whatever color you want your kitty to be. I just did white, but orange or teal kitties could be cute, too!
4. Once your paint has dried, remove the painters tape slowly.
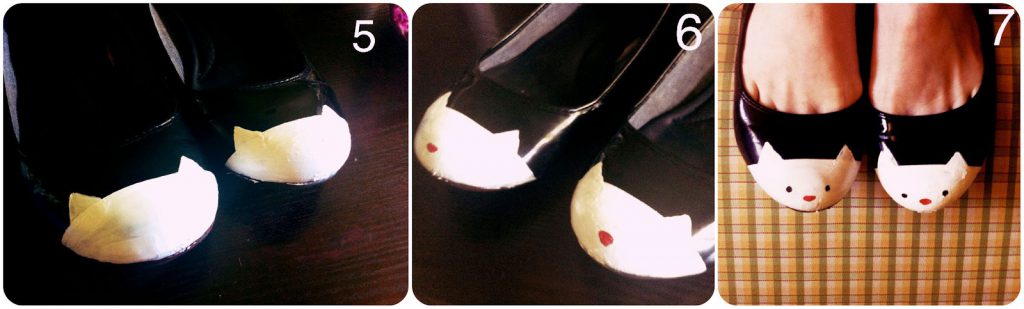
5. Paint wide triangles on both kitty heads.
6. Add a little red or pink nose just below the centermost point of the cat noggin.
7. Finally, add black dots for eyes. Once everything’s dried, you’re finished. Feel free to add whiskers or small pink triangles inside of the ears to make your cat more realistic looking.
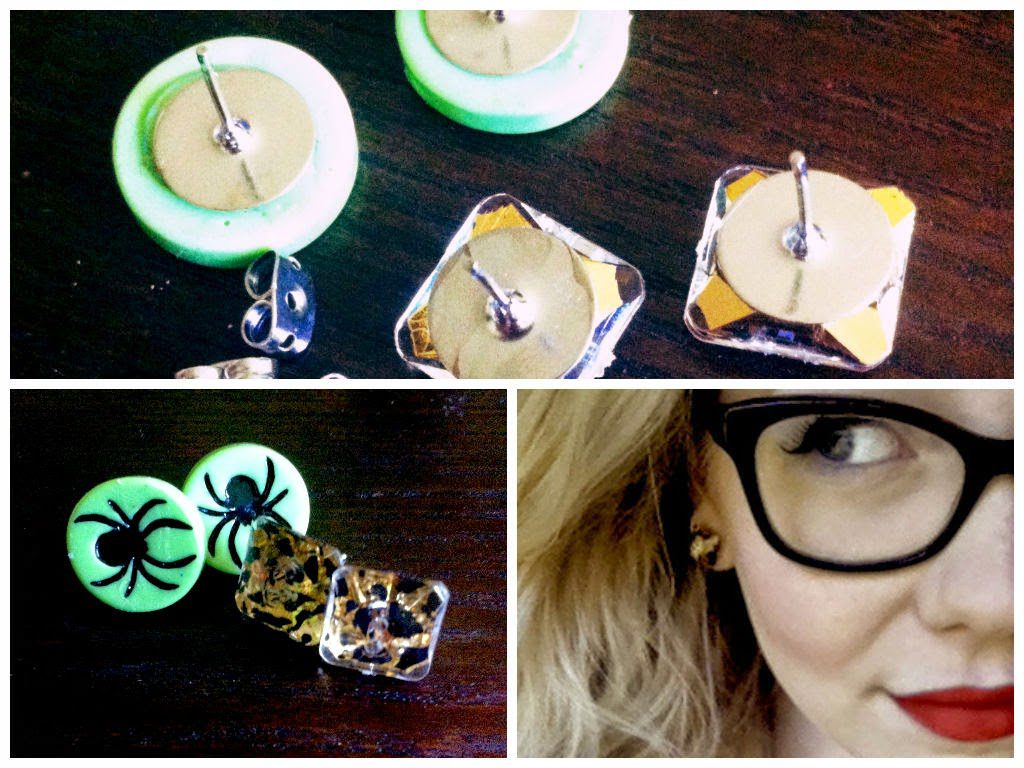
Button Earrings
These are profoundly easy to make. Pick out any fun buttons or notions, they can be new or old. I enjoy the spookier things in life, so I chose spiders and leopard print for mine. You can get these materials at Hobby Lobby, Michaels, or most likely any craft store. Make sure to call ahead to confirm that your store carries flat pad earring posts.
Materials:
- Flat Pad Earring Posts and Closures (They usually come as a set.)
- E-6000 Industrial Strength Adhesive
- Buttons, Notions, Small Knick Knacks
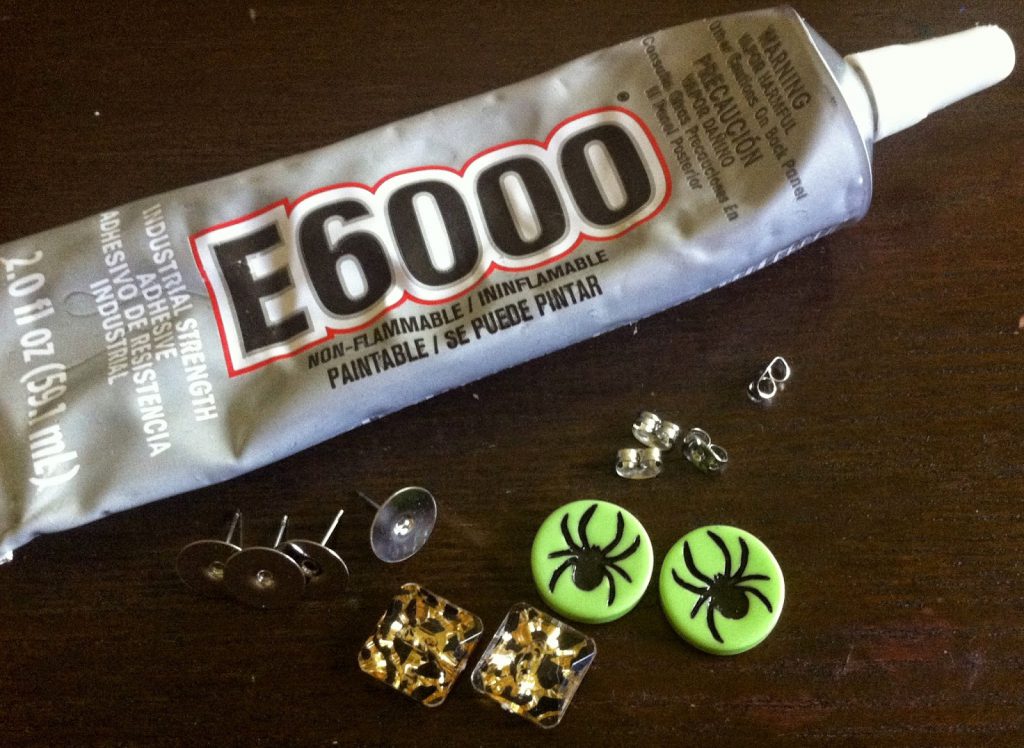
1. Dab a little bit of the E-6000 on the back of your button. A little will go a long way and you don’t want any extra gooping out the sides, it might irritate your skin.
2. Allow them to dry, button side down for 24 hours.
3. Wear them and look awesome.
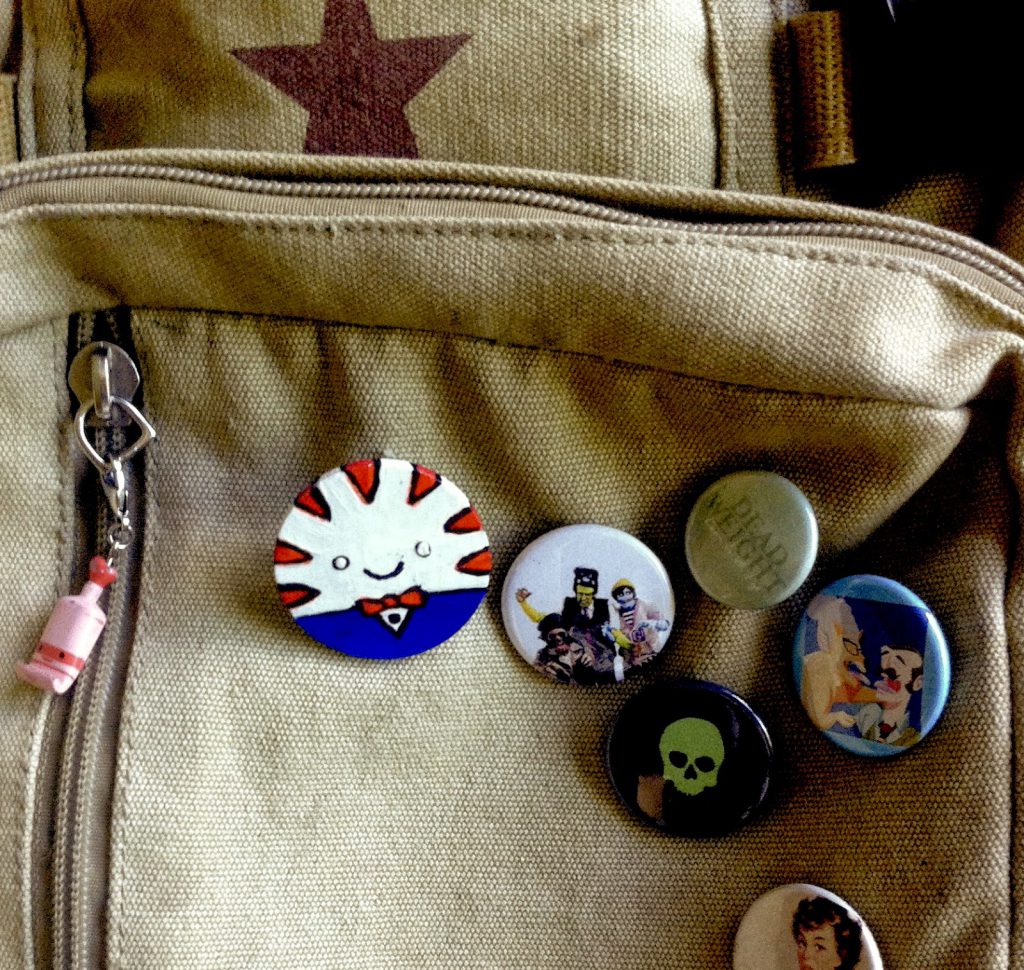
Peppermint Butler Pin
Everyone loves Adventure Time’s little sadist Peppermint butler! Wear him on your lapel, backpack, or to hold a scarf in place!
Materials:
- Wooden Disc
- White Acrylic Paint
- Red and Blue Oil Paint Pens
- Black Sharpie or Black Paint
- Self Adhesive Pinback
- Krylon UV-Resistant Clear Matte Finish Spray (Shown in Step 9.)
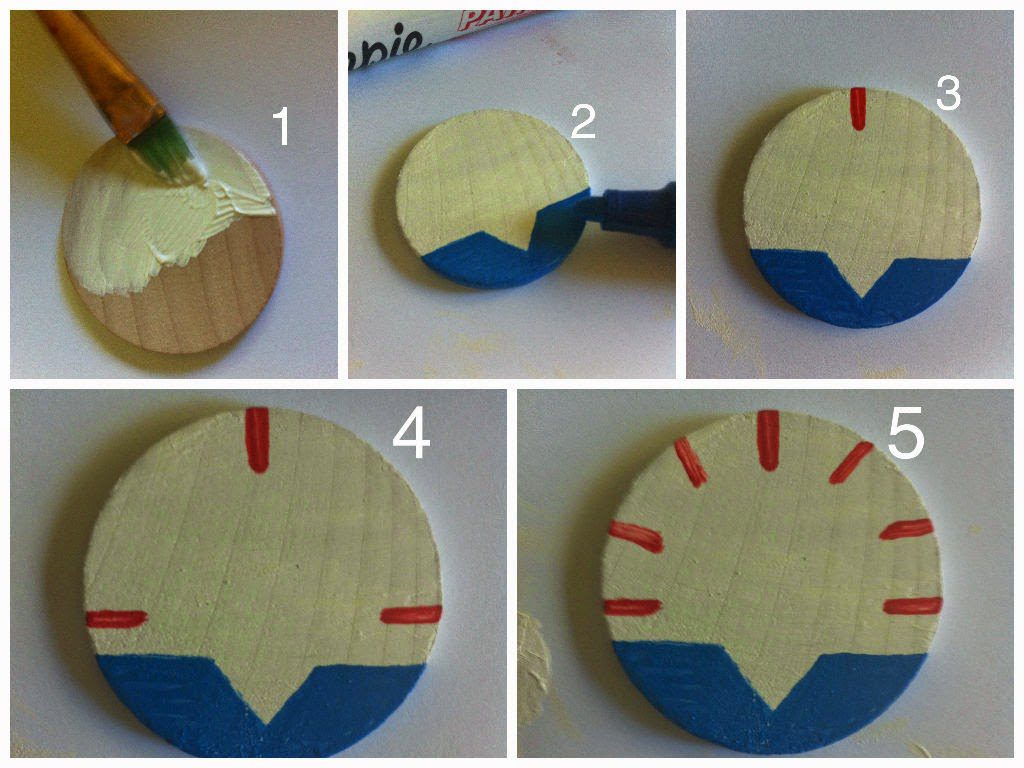
1. Paint front of disc and sides white.
2. Paint a line with a V in it using the blue paint pen. Make sure it’s only about ¼ of the way up from the bottom. Paint blue on the side where his pants will be as well.
3. Put a short red line with your paint pen at the top center.
4. Then two more short red lines.
5. Put two more in between both of those.

6. Round out the lines to make them look more like peppermint markings.
7. Add bow tie, button, and outline this area with black paint or sharpie.
8. Outline the rest. Go back in with white paint to correct any mistakes. This will also make the lines look cleaner. If the brush strokes bother you, don’t worry, the spray will even it all out in the next step.
9. Spray your disc with three coats of UV-Resistant Clear in Matte. Allow it to dry ten minutes between each coat.
10. Remove backing from adhesive on pin. Place the pin a little higher than halfway up, but not so you can see it from the front.
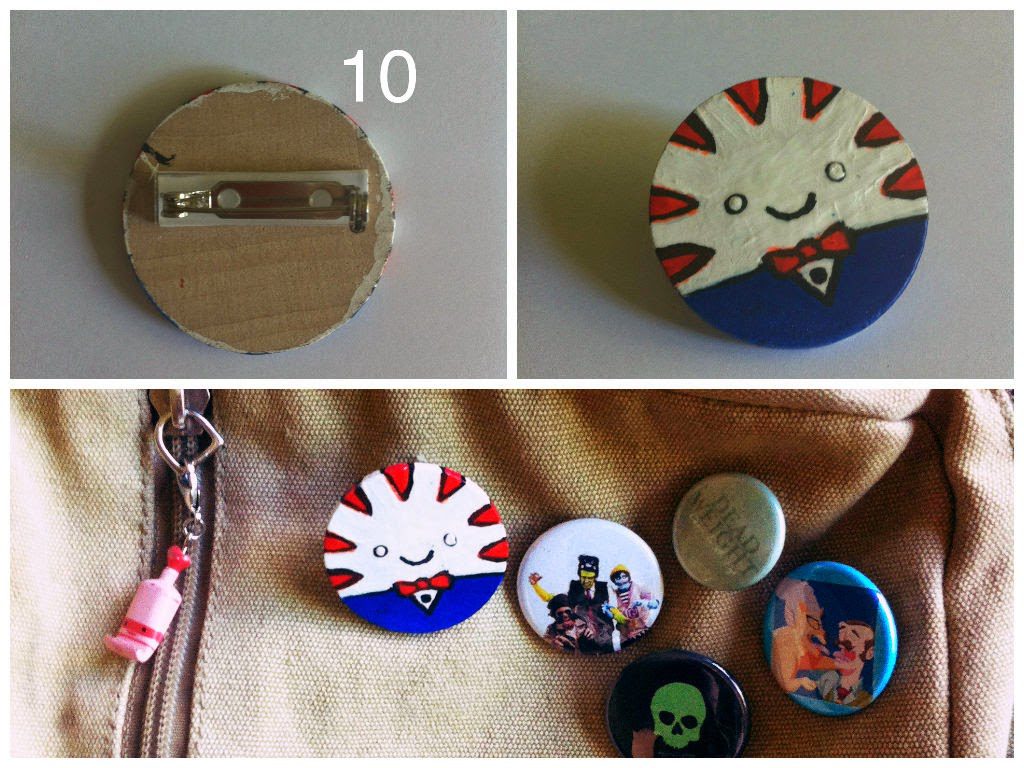
Now, you’re all done! He makes a great gift or super cute addition to any bag or sweater.
You could give Peppermint as a gift in a cute personalized muslin bag or pop him onto a ribbon of a gift as an added bonus.
You would totally be the gift receivers new best friend. I mean, who doesn’t love having someone crafty around?